TypedArray和obtainStyledAttributes使用
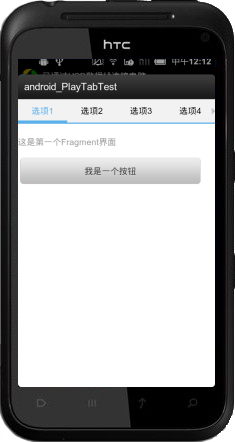
在编写Android自定义按钮示例基础上,如果要指定字体大小产生这样的效果:

其实是不需要自定义变量的,可以直接使用TextView的配置属性:
        <com.easymorse.textbutton.TextButton
             android:layout_width="fill_parent" android:layout_height="fill_parent"
             android:layout_weight="1" android:text="电影"
             android:gravity="center_vertical|center_horizontal"
             android:background="@drawable/button" android:focusable="true"
             android:clickable="true" android:textSize="22sp" />
在这里字体大小使用了sp,这里要说一下sp与dp(dip)的区别,dip是:
dp Density-independent Pixels – an abstract unit that is based on the physical density of the screen. These units are relative to a 160 dpi screen, so one dp is one pixel on a 160 dpi screen. The ratio of dp-to-pixel will change with the screen density, but not necessarily in direct proportion. Note: The compiler accepts both "dip" and "dp", though "dp" is more consistent with "sp".
不过,要是和字体有关,最好还是用sp,和dp类似,但更适合字体大小:
sp Scale-independent Pixels – this is like the dp unit, but it is also scaled by the user’s font size preference. It is recommend you use this unit when specifying font sizes, so they will be adjusted for both the screen density and user’s preference.
这里为了演示使用自定义变量,字体大小改用自定义的属性。
首先要创建变量,创建了个values/attrs.xml文件,文件名任意,但是要在values目录下:
      <?xml version="1.0" encoding="utf-8"?>
         <resources>
             <declare-styleable name="button">
                 <attr name="textSize" format="dimension" />
             </declare-styleable>
         </resources>
根标签要是resources,定义的变量要有个名字,declare-styleable name="button">,这里定义名称为button。在这个名称里,可以有多个自定义属性。定义了个名为textSize的属性,格式是 dimension,这个format指定了textSize属性的类型,只能用于定义字体大小。
在布局文件中通过自定义属性赋值:
        <?xml version="1.0" encoding="utf-8"?>
         <LinearLayout xmlns:android="http://schemas.android.com/apk/res/android"
             xmlns:myapp="http://schemas.android.com/apk/res/com.easymorse.textbutton"
             android:orientation="vertical" android:layout_width="fill_parent"
             android:layout_height="fill_parent" android:background="@drawable/background_color">
             <LinearLayout android:layout_width="fill_parent"
                 android:layout_height="10dip" />
             <LinearLayout android:layout_width="fill_parent"
                 android:layout_height="40dip">
                 <com.easymorse.textbutton.TextButton
                     android:layout_width="fill_parent" android:layout_height="fill_parent"
                     android:layout_weight="1" android:text="电影"
                     android:gravity="center_vertical|center_horizontal"
                     android:background="@drawable/button" android:focusable="true"
                     android:clickable="true" myapp:textSize="20sp" />
这里在根标签中增加了:
xmlns:myapp=http://schemas.android.com/apk/res/com.easymorse.textbutton
声明了myapp这个名字空间,myapp是任意的名称,自己可以随便起名,后面的:
http://schemas.android.com/apk/res/
是固定的。再后面接的是应用的包名。
在下面自定义按钮中的:myapp:textSize,就是使用<attr name="textSize"这个变量了,给变量赋值。
还需要一个过程,就是在程序中获取到这个赋值:
      public TextButton(final Context context, AttributeSet attrs) {
         this(context, attrs, 0);
         TypedArray typedArray=context.obtainStyledAttributes(attrs, R.styleable.button);
         this.setTextSize(typedArray.getDimension(R.styleable.button_textSize, 15));
         typedArray.recycle();
      }
其中,TypedArray实例是个属性的容器,context.obtainStyledAttributes()方法返回得到。 AttributeSet是节点的属性集合,在本例中是<com.easymorse.textbutton.TextButton节点中的属性集 合。
这句话:
typedArray.getDimension(R.styleable.button_textSize,
15)
将获取自定义textSize的值,如果没有,则使用默认的值,15。
最后别忘记调用:
typedArray.recycle();
作用是:
Give back a previously retrieved StyledAttributes, for later re-use.
这里的自定义属性的format,可以有很多种:
referenc、string、color、dimension、boolean、integer、float、fraction、enum、flag


